We got introduced to the basics of Unity, where I completed the roll a ball tutorial even though Unity was quite easy to work with for me the programming part just really challenged my nerves because ti is something I am really not used to and nothing I am expecting to diver deeper into but it was a fun experience and I was quite surprised that I was able to finish it.
Source: https://learn.unity.com/project/roll-a-ball & Remco
How to set up the roll a ball game with the steps that will help me remind it if I would want to do it again with my own notes:
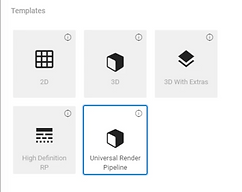
1. Create a Unity Project in the Unity hub
-
Set up your workspace:
2. Create a new scene
With File > New Scene.
To stay organized it helpful to create a new template folder within the Assets directory. Therefore
I move all of the existing asset folders there to keep the project organized. Then I saved the scene by going
back to File > Save As.
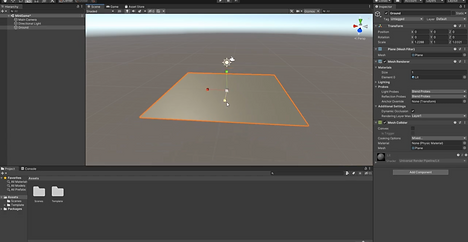
3.Create a primitive plane
4. Scale the Ground Plane
This reminded me a bit of
Maya in the way of how to
scale, the layout, the feeling
of the mouse and the courser.
So I could already see some
parallels and things I am familiar
with.
-
Create and position some basic objects for your game:
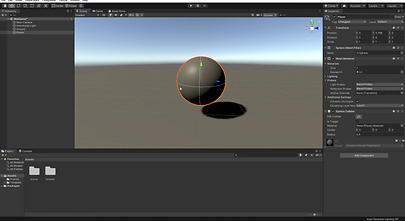
5. Create a Player GameObject
We use a sphere to create the Ball, therfore go to: Hierarchy>, Create menu>select Sphere
Give it the name Player. Set the Transform to 0,0,0. (Origin point)
-
Configure the lighting and game background:
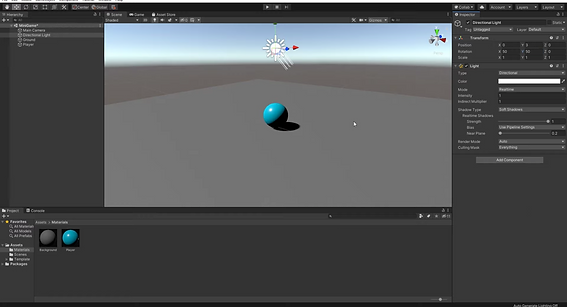
6. Induction to simple lightening
The sky box and a directional light in the game view represent the sun, causing
the shadow underneath the ball. To change the directional light:
Hierarchy> Directional Light > review it in the Inspector.
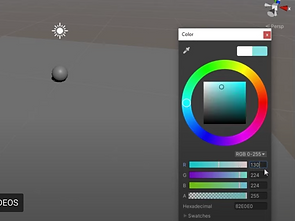
To change the tint of the light to a pure white:
Selecting the colored selection square> color wheel >color picker to choose a color.
OR: (specific colour)>set the RGB values to 255, 255, and 255. (pure white in this case)
7. Applying Materials (Colours in this case)
For the background:
Project window> Create menu> rename folder Materials.
Create menu>select Material>Background is created.
To set an exact colour use inspector >Base Map. Click Base Maps color field>open a color picker> pale grey in example.
To apply the material to the plane:Material> drag it onto the plane in the Scene
Colour the Player:
Create > Material>name new material, Player.
Inspector> Click Base Maps color field>open a color picker> light blue.
(or RGB values for exact colour)
-
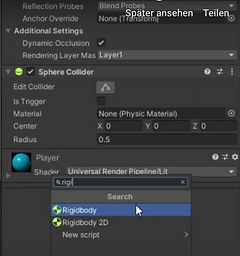
Add a Rigidbody to the Player sphere, so you can use the Unity physics engine:
1. Add a Rigidbody to the Player
This means: How the player GameObject should move and behave.
3. Add a Player Input component
-
Write your own PlayerController script in C#, to make the sphere respond to player input:
4. Create a new script
C# as the programming language as this is what Unity supports. I have never programmed before so I have to download Visual Studio first to be able to have a foundation and program to work in.
Assets > Create>a new C# script
5. Write the OnMove function declaration
There are three namespaces used in the template, System.Collections, System.Collections.Generic, and UnityEngine.
The additional one I need for this script is the InputSystem namespace.
New line> Write using UnityEngine .InputSystem; (= enable access to the code and functions in the InputSystem namespace in this script.)
Write a function declaration, which tells the computer to create a function.
New line>Write void OnMove, open and closed brackets.
Add an open curly brace>leave a line> closed curly brace.
The space inside the braces -> the function body, and this is where you add instructions for the computer to complete.
(These instructions are specifically for the function OnMove.)
6. Apply input data to the Player
Get movement input data from the sphere and store it as a Vector2 variable.
Space inside the OnMove function> add the line>Vector2 movementVector = movementValue.get < Vector2 > ;
--> creating a movementVector
7. Apply force to the Player
Add or apply forces to the Rigidbody and move the player GameObject in the scene:
CONTINUE WITH:
1.Set the Camera position
Tying the camera to the to the player GameObject so it moves with the ball.
Positioning the camera: Y=10, rotating by 45 degrees
Now the problem: when the player moves in the game, the camera will move with them
Solution: Detach the camera from the player, new offset value will be the difference between the player game object and the camera
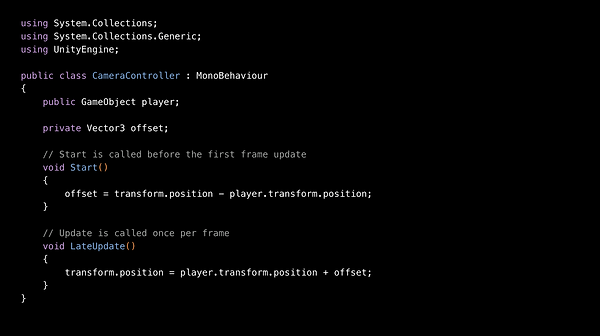
2. Write a script to make the Camera follow the Player sphere with a fixed offset
Hierarchy> Add Component> mane it CameraController.
Two variables: A public GameObject reference to the player GameObject & a private Vector3 variable to hold the offset value.
3.Reference the Player GameObject
Drag the Player GameObject from>Hierarchy> player slot (in camera controller component)
-
Creating and configuring one wall:
1. Create a wall for the play field
The edges keep the player GameObject from falling off and place a set of collectible objects.
Hierarchy> new Game Object> name it walls then Hierarchy>select Create > 3D Object > Cube> Size the cube
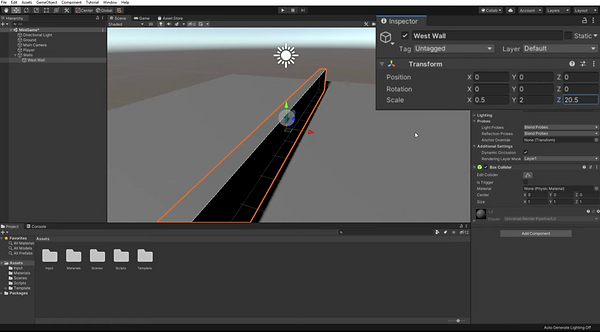
Focus scene view on this wall (F on keyboard). Exact values:X=0.5, Y= 2, Z= 20.5
New material to change the color of the wall: Material Folder>Create > Material>rename to Walls
-
Duplicating the walls and placing it to create a contained game area:
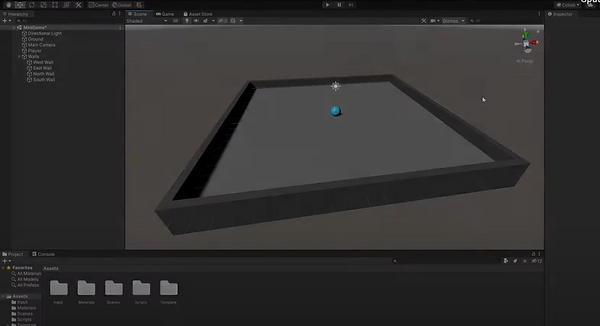
2.Finish the play field walls
GameObject>Duplicate, so all walls are the same because the one I already created is the perfect size.
-
Create a PickUp GameObject for the player to collect
1.Create a collectible GameObject
Add>3D Object>Cube> name it PickUp.
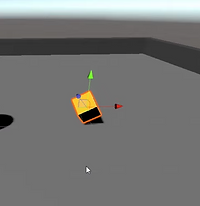
Form the cube how I want it to be just a bit rotated and
in another colour (see steps above for colour adjustments, placements etc.).
-
Write a script to rotate the collectible
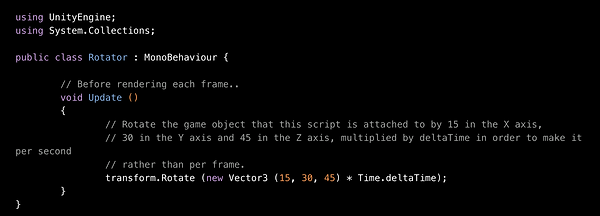
2.Rotate the PickUp GameObject
--> make the PickUp GameObject spin while the game is active
-
Turn the PickUp GameObject into a Prefab
-
Instantiate the Prefab around your play area
3.Make PickUp a Prefab
A prefab is an asset that contains a template, or a blueprint, of a GameObject or GameObject's family.
-->can use the prefab in any scene in your current project
--> able to make changes to a single instance of the prefab or to the prefab asset itself
Create > Folder> name Prefabs>Select the pickup GameObject(Hierarchy)>drag to Prefabs folder
4.Add more collectibles
Hierarchy>create a new GameObject> name Pickup parent
Select Reset> pickup parent to origin. Hierarchy>drag the pickup GameObject>to pickup parent.
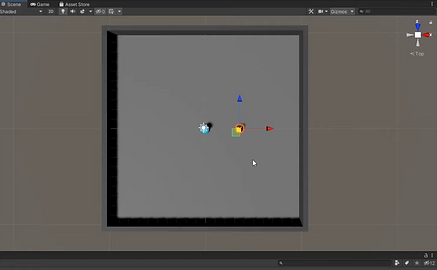
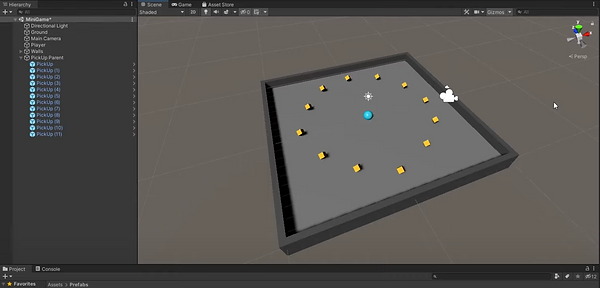
Go to top view to duplicate the Pick up. Use command-D to duplicate as many pickups as I want ( I choose 12 as in the instructions).
-
Revise your PlayerController script to make PickUpGameObjects disappear when they collide with the Player sphere
1.Disable PickUps with OnTriggerEnter
Being able to collect the pickup GameObjects when the player GameObject collides with them.
2.Add a tag to the PickUp Prefab
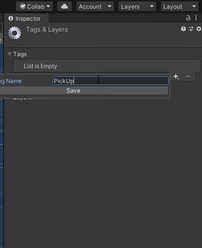
Inspector>Tag List> Add> Name PickUp
Apply that tag to the prefab asset.
3.Write a conditional statement
-
Set the Prefab PickUp Collider as a trigger and add a Rigidbody component, to make the collectibles work properly
4.Set the Pickup Colliders as triggers
Turn a collider into a trigger, now it's not possible for the ball to "destroy or pick up" the cubes. Therefore a trigger event message is needed.
Then> Project window>prefabs folder>pickup prefab
In the Inspector>Box Collider component> enable the Is Trigger checkbox
= through the power of prefabs all the pickup GameObjects have trigger colliders
5.Add a Rigidbody component to the PickUp Prefab
PlayerController script:
REMEBERING:
Dynamic colliders can move and have a Rigidbody.
Standard Rigidbodies are moved using physics' forces.
Cinematic Rigidbodies are moved using their transform.
-
Revise the PlayerController script to store the value of collected PickUp GameObjects
1.Store the value of collected PickUps
To count the collectables, I need a tool to store the value of the counted collectibles and another to add the value as I collect and count them
Player GameObject in the hierarchy and open the Player Controller script for editing:
2.Creating a UI text element
--> Displaying the players collectible cube count:
Hierarchy > Add button and go to UI > Text - TextMesh Pro>Import TMP essentials (popped up In Hierarchy-Text TMP= UI text element
Important: all UI elements must be the child of a Canvas to behave correctly
Change to 2D view to adjust the Text, placement colour, font etc.
-
Create and configure UI Text Elements to display:
-
The count value
-
Connect the created text element to the Player Controller script to get it working.
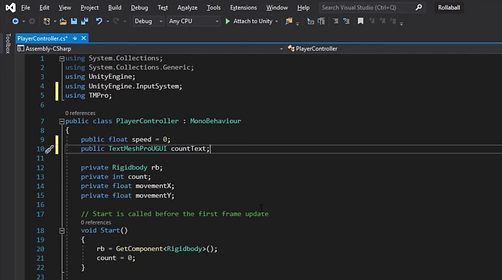
This variable will hold it a reference to the UI text component on the count text GameObject.
Next, set the starting value of the UI text property and get it to change as the count value changes throughout the game.
-
-
An end of game message
-
To surprise the player: Simple message for the player when they've collected all the cubes. ( Winning)
Add button> UI > Text - TextMeshPro > UI > Text - TextMeshPro
Like before it is created as a child of a Canvas GameObject> rename to "win"> Change Font, colour and content
Transform components: X= 0, Y =130
Adding a reference for UI text to the player controller script:
--> creating a reference to the GameObject since it only needs to appear and disappear
Starting state for the object to be disabled, since text should only be visible when the player won the game (collected all the pickups)
>add the code disabling the UI text to the start function
>need to define when the UI Text will be visible
Select the Player GameObject >Hierarchy>drag the WinText GameObject>to the slot
PLAY
VR Setup Workshop on Campus
For the second Unity experience we were with our group separated into two different rooms and we were explaining our other members how to set up an interactive scene. It went quite well because we had good instructions and all of us completed the Roll a Ball tutorial so some actions were familiar to us and Erwin, Robbie and Wiandi explained it really nice and easy to us. So we were able to play the cube game we set up.
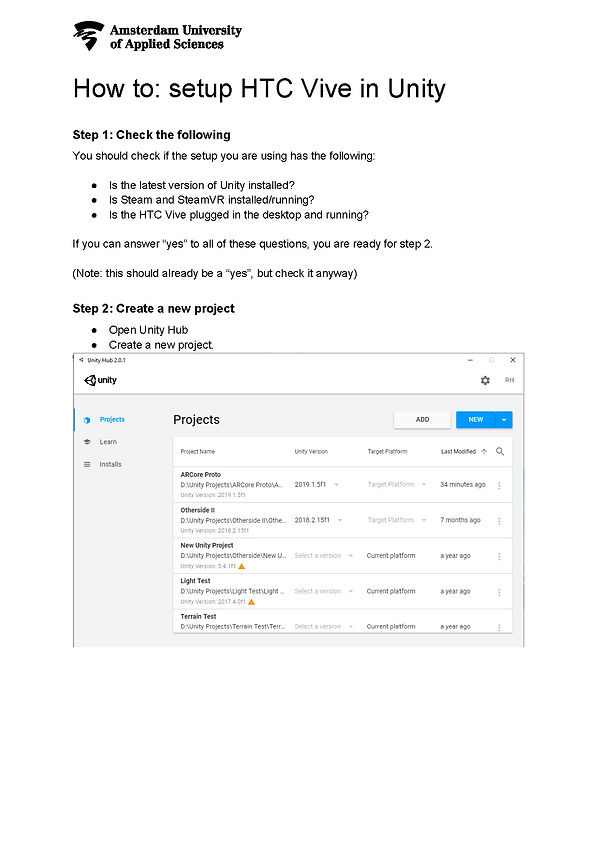
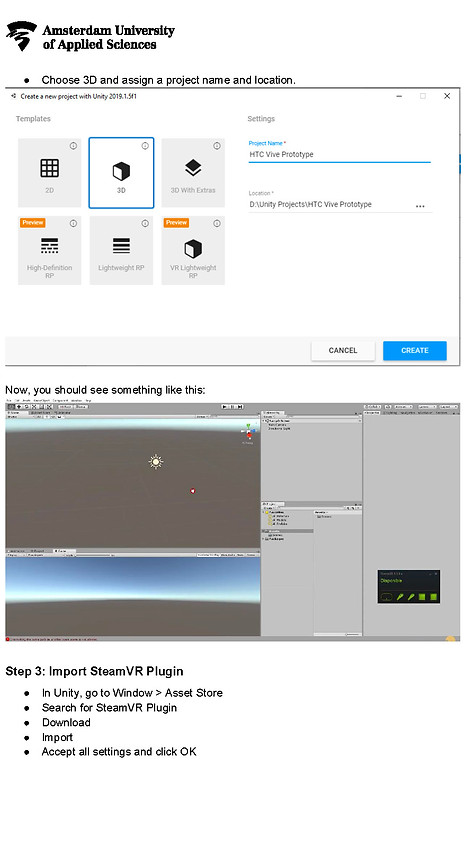
Here are the steps to remember from the Hand out and the explanations we got:
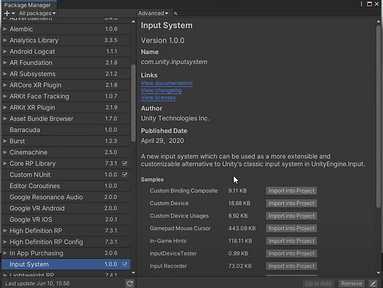
2. Install the Input System package
These packages are used to add specific enhanced
functionality to your Unity Project
Window > Package Manager> Find Input System>Install to
add the package to the project.

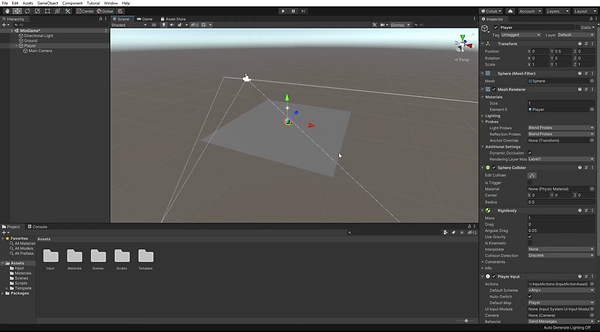



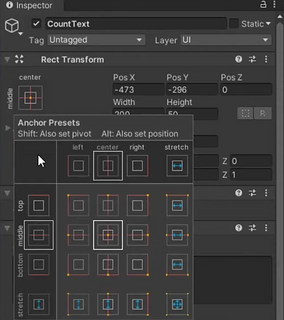
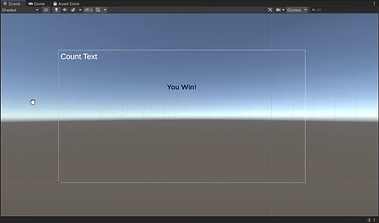
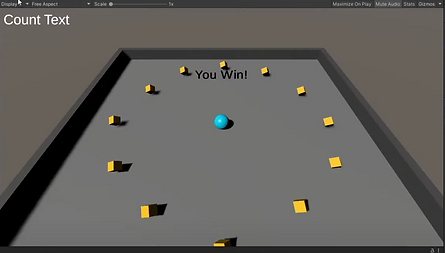
Anchor the Text>Anchor Presets to the upper left corner of the screen by holding shift and option pressed to move it.






SET UP THE OCULUS RIFT S IN UNITY
From school, I have the Oculus rift at home and installed everything on the PC that I also got from school. Oculus TV works fine but now I want to connect the VR headset to a scene where I will be working in. To do so I followed this tutorial (https://www.youtube.com/watch?v=J5pWiDf16mM) and it worked very well, but my question now is if I have to do these steps for every scene or is there a default that I can arrange somehow?
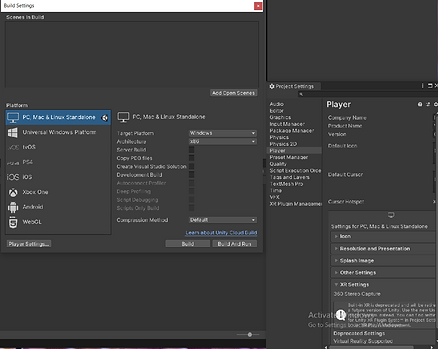

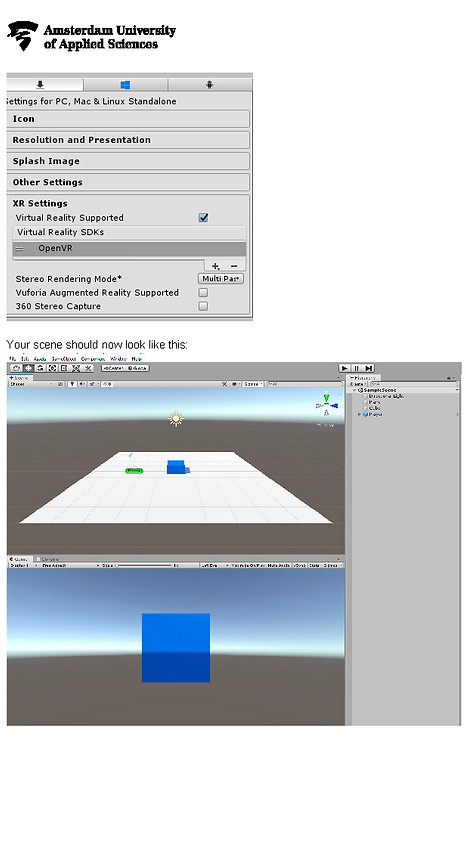
1. Go to Scene in Build and check the VR supported field

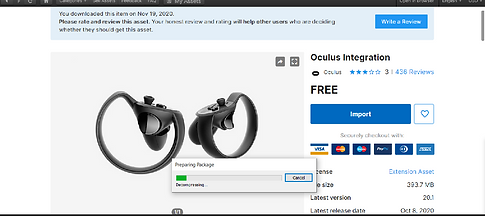
2. Go to the Asset Store
and look for oculus
integration and import it
in your scene.
3. Go back to your scene >Assets>Oculus>VR>Assets sand drag the Second cube "CameraRIg" into the Hierarchy
4. Change the camera by deleting the main camera and set the current >tracking to >floor level
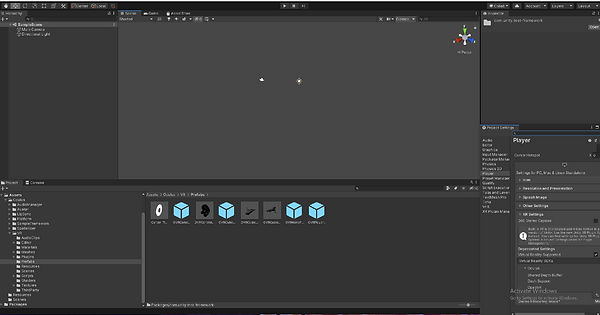
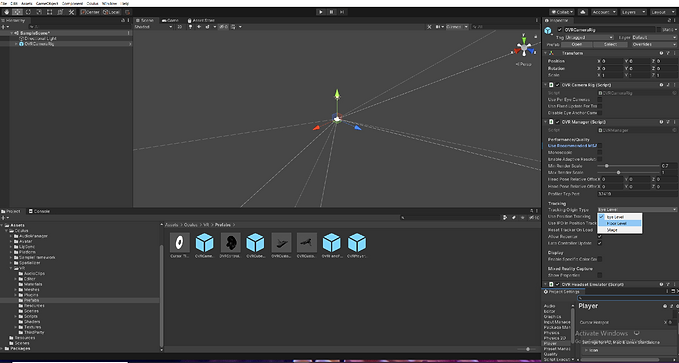
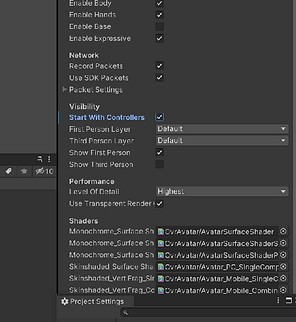
5. To add the hands/controllers go to Assets>Oculus>Avatar>Content>Prefabs and drag the "Local Avatar Prefab" in the Hierarchy
Makes able to grab and interact with the environment.
Then check the "start with controllers" in the inspector

IMPLEMENTING A MODEL IN UNITY
I made this rotary cutter in Maya and textured it in substance painter. I would love to put it in a unity scene and take the textures with it. In addition, I want to make an easy animation out of it. I will try to make the saw move up an down.

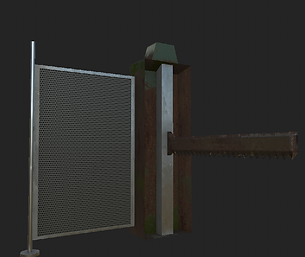
Important when importing a model in unity is the size. When implementing more models it is useful to set a scale such as 1m=1 square on the Maya grid is an easy way.
>Export the Maya model as FBX
>Export the Substance Materials separately in a folder
NOTE: When sending 3D models incl. textures make sure to put all in one .zip file.
Its the easiest and most convenient.
Create a new Unity project and first install my VR glasses as described above.
Then >Import New Asset (Model)
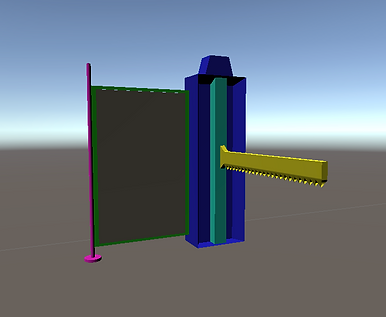
The FBX will have a little arrow on its picture that's normal since I assigned all the parts with separate materials. That's why the cutter looks like a clown here:

It's good to keep the files organized so I could also exchange textures easily when needed. Just create new folder and pack everything that belongs together in one folder.
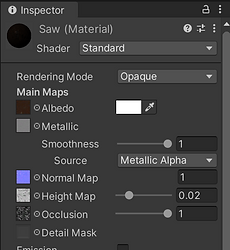

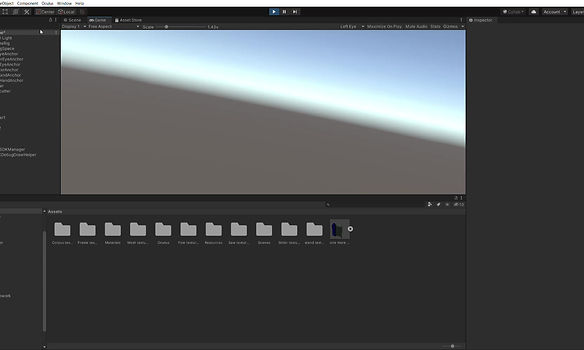
Then create a new Material in the Asset window and name it like the part you want to assign this material to. For example, the saw in my case.
Then import the texture files. In the Inspector apply the normal map.
Go to your material and in the inspector drag each texture file in its right spot.
In the 3D window, the change is immediately visible.
CREATING A MINI ANIMATION IN UNITY
I used the animation tool in unity to create the saw moving up and down.
In the factory the rotary cutter cuts the wires of bales being bound together, my goal was to imitate that. Of course, this is way slower and more detailed in reality.


I used the animation tool in unity to create the saw moving up and down.
In the factory the rotary cutter cuts the wires of bales being bound together, my goal was to imitate that. Of course, this is way slower and more detailed in reality.
Select the Model and Add "Animator" as a component.
Then chose

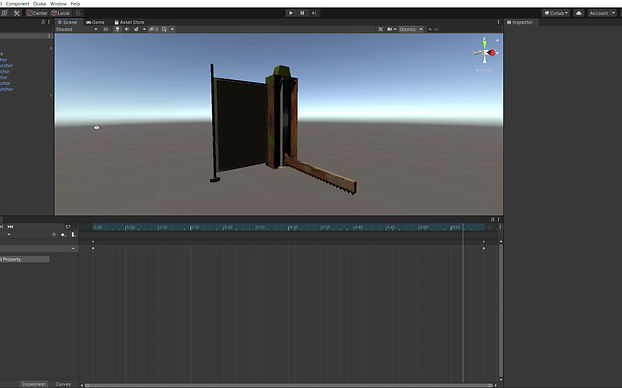
Save the Animation in an Asset folder.
Create an animation (similar to Maya) by start recording and moving the keyframes and changing the models' position.
So here I decided to work in keyframes from 0 to 45.
O= Saw on top of the slider
45= on the bottom
For exact postions, the transform window is very helpful.
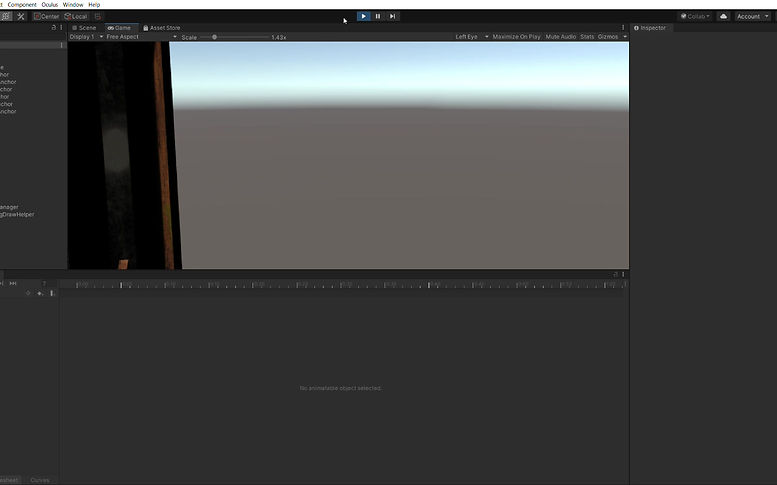
RESULT IN VR
CREATING SMOKE IN UNITY
For our design atmosphere in the factory, we agreed on creating a rusty and polluting atmosphere. therefore I decided to take action and create smoke in Unity even though I am very fresh to the program.
I followed this tutorial https://www.youtube.com/watch?v=R6D1b7zZHHA&t=434s, which really helped me to achieve the goal.
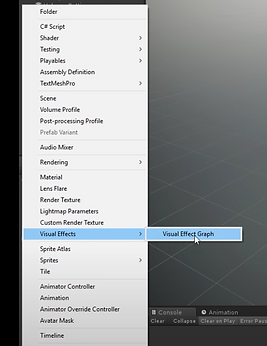
I am using Visual Effect Graph to create a simple particle movement
then define the texture and more details.
Preview
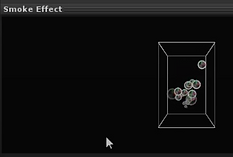
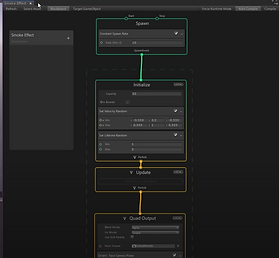
Create>Visual Effexts>Visual Effect Graph
Drag it in the Hierarchy to make it visible
in the scene
Double click on the effect and a tab
will open
INITIALIZE TAB
Higher the Capacity so there are more particles at the same time (bigger smoke effect)
A Lifetime between 5 and nine is good so the particles will last a bit until they disappear which gives a more realistic smoke effect
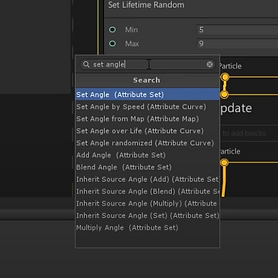
More organic feel by letting the particles rotate randomly
Add: Set Angle Attribute and Select Z-Axis and change it in the inspector from off to random (per component).
Min 0°
Max 360°
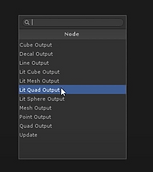

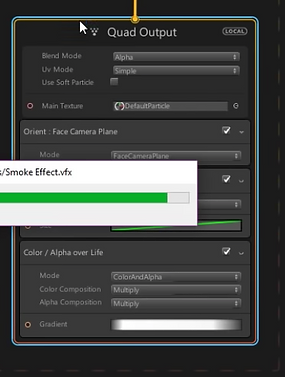
Delete Quad output and create a new one
Check the box for soft particles and add the smoke texture
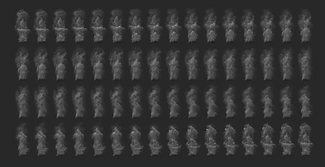
I had some problems finding the right texture because we are going to use the flipbook option. Therefore it is important that the picture has several smaller pictures so the particles can be seen more realistic here is an example of what went wrong for the first time I tried it:
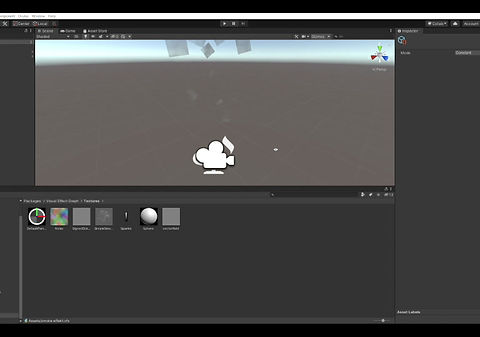
What went wrong?
The particles didn't look like smoke it was the actual picture that got thrown around.
I tried it with multiple other textures, nothing seems to work. I also asked my group members about it, and they also said everything in the process is normal besides the picture throwing.
When I watched the tutorial over and over again I realized that my flipbook number wasn't coherent with the number of small pictures in my texture.
I framed it from x=8 to 1y=0 even though the picture consisted out of 8x8 pictures.
When fixing it to x=8 to y=8 , everything worked pretty well.
By adding a multiple size editor and put in on 2 the particles are being doubled for a more realistic effect.
Then add the flipbook player to animate the texture:
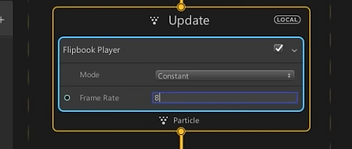
PARTICLES BEHAVIOUR
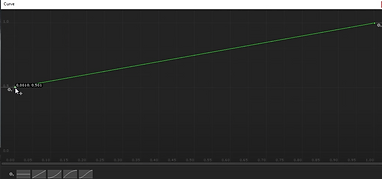
Make them grow overtime on their way up:
Set size over Life Block to 0.5 on the curve
Add force to the Update channel to give
it more dynamic, here it is all about how the smoke should look like. Rather wide or airy or blown away from the wind etc.
Creativity and endless possibilities.....
I chose x=-0.2, y=0,5 and z=0
Making the particles facing the camera:
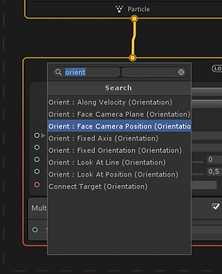
Keep linear drag on and set the material type in the Inspector to Transparent so light can go naturally through the smoke, like in reality.
I realized that it is important to actually stick to naturally given guidelines to create it as realistic as possible.
By adding "Colour over life attribute" gives the possibility to change the smoke in as many colors as you would like.
In this case I chose grey/black

What I have learned through this: I learned an interaction in Unity with the help of Visual Effect Graph that allows me to create realistic moving particles that I can determine in size, speed, rotation, and scale.
What I learned from this as a whole:
I know how to implement models, apply materials on them with imported textures.
I can make a particle system by using a blackboard and added several components.
I can determine the behaviour of the particles in time, angle, mass, duration etc. I worked with quat output as well as a flipbook player.
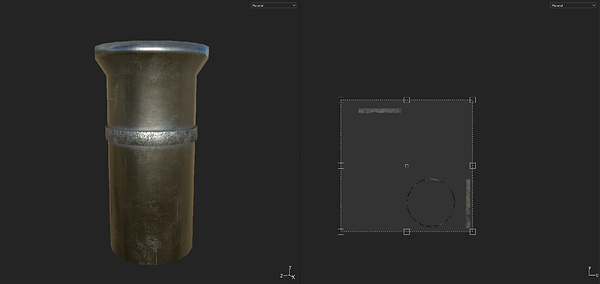
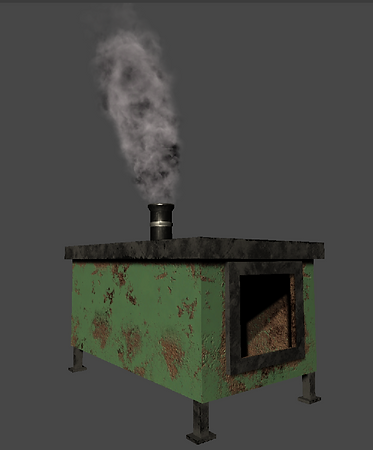
Adding Asset (Chimney Model) for the smoke to come out. Putting everything together:
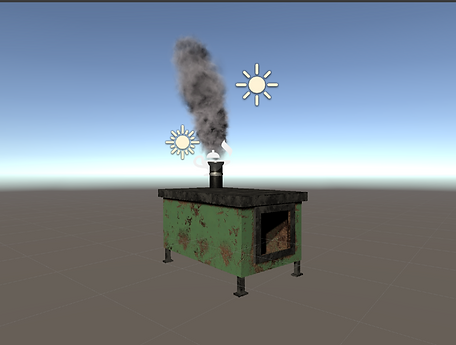
I had some small troubles getting the smoke working because I didn't import the visual graph in the scene where I opened the incinerator.
Bt that was fixed quickly
FINAL OUTCOME
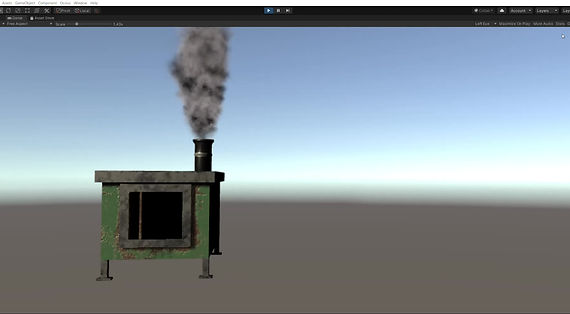
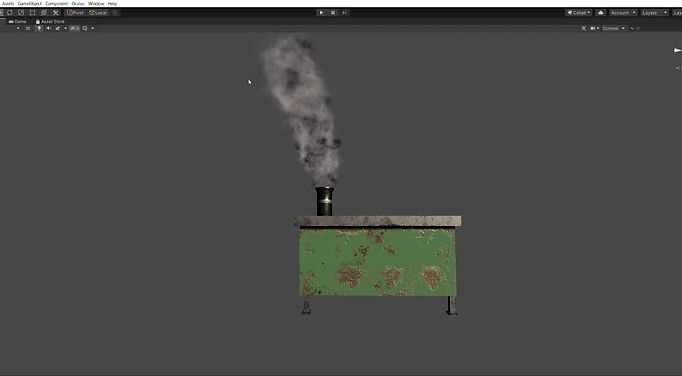
SHREDDER INTERACTION IN THE GAME
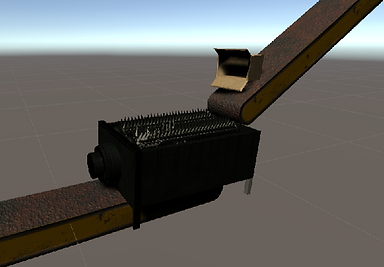
One of our oupgrades is unlocking th paper conveyor belt where paper cartons and other paper waste is being shredded.
Therefore and input/output system in needed where a big block falls inside the machine and small pieces are coming out.
THIS IS NOT IN THE REAL SCENE JUST A MOCKUP I DID TO GET A PICTURE OF HOW IT WOULD FUNCTION

1.
Getting the shredder in the scene and scale it up to 100, since that is the measures we are working with. It is always possible to scale it down afterwards.

2.
Whe getting it into our scene fusion scene (some parts look pink for me but in the managers scene everything works fine), add an empty game obcet as input and add a collider to it as well as an output as its parent.
Also to specify the output location for compressed waste, locate it where it should come out of the shredder. ( In this case the tube in front of it)
4.
Creating a prefab out of the outcome (wrapper with cardboard texture)
by dragging it from the hierarchy into the assets folder

3.
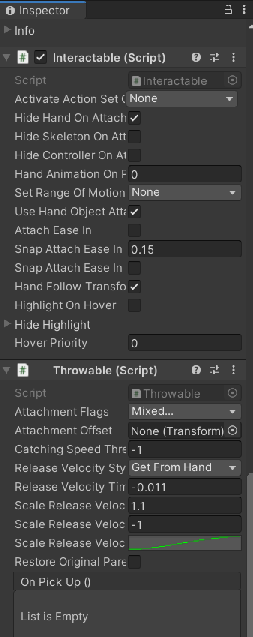
Adding the same script as used for our compressor:

5.
I added these components to the output:
a)Mesh collider: The Mesh Collider takes a Mesh Asset and builds its Collider based on that Mesh.
It is more accurate for collision detection than using primitives for complicated Meshes. Mesh Colliders that are marked as Convex can collide with other Mesh Colliders.
b) Rigidbody: Adding a Rigidbody component to an object will put its motion under the control of Unity's physics engine. A Rigidbody object will be pulled downward by gravity and will react to collisions with incoming objects if the right Collider component is also present
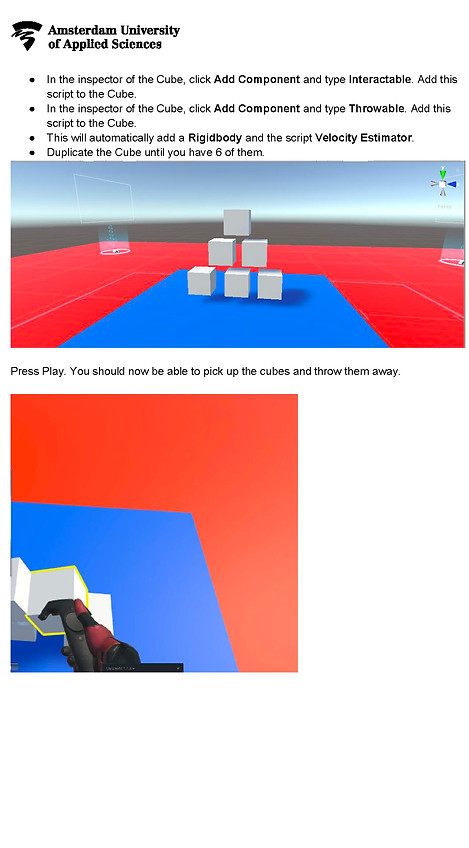
c) Interactable script: Enables the player to interact; grabbing the object
d) Trowable script: Enables the player to throw the object.
So this means all those attributes are applied to the wrapper/shredded paper.
I rant into a problem and asked Robbie for help because for now the script was only for metal, so I tried it with a metal block. It kept disappearing in the shredder so the input system worked but the wrappers weren't coming out.
Since we are working in different scenes for the several upgrades everything that is not in the very first scene is also automatically not in the others.
So to fix:
We compared it to the compressor which had a similar interaction and took over those exact scripts. So when changing them it should work fine.
Then we should be able to export it as a package and import it correctly in the main scene.
What I learned from it:
I learned how to create an input output system, adding empty game objects and distributing components to them. I learned how to cerate a prefab and add it to scripts which I copied into visual studios in order to get an interaction working where a big carton box gets transformed into small bits.
RESEARCH: UNITY AND DIGITAL FASHION
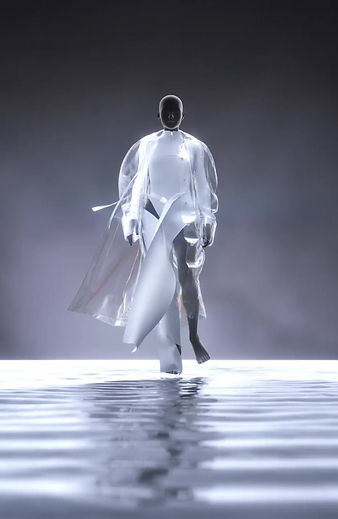
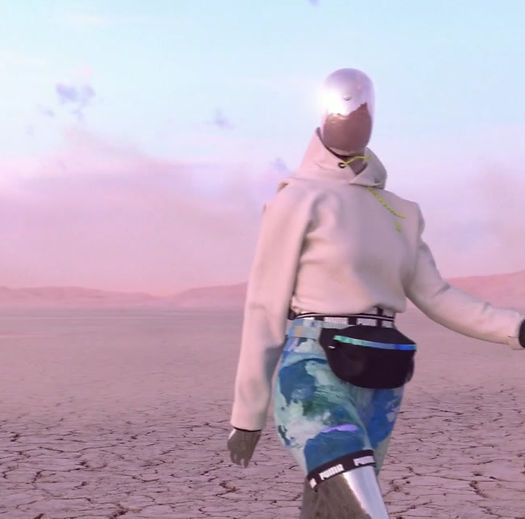
The fashion industry has always looked to tap into an unknown market to drive growth. Usually, this meant opening new stores in previously unserviced locations, but then e-commerce came along and changed everything. The next big thing is a virtual reality since it is very engaging and offers a level of user immersion that cannot be rivaled by any other technology. Virtual reality can become a powerful and indispensable tool to connect and interact with customers.
The biggest segment of the fashion industry that is being changed by VR is apparel. Times are rapidly changing. People no longer go to a showroom or their favorite store to try on clothes and to see whether or not an item suits them. Instead, we see virtual humans, 3D avatars, who are modeling the clothes we are interested in. This saves customers a lot of time and money, not to mention the convenience of doing all of your shopping without ever leaving your house.
Another interesting example of virtual reality in the fashion industry is simulating the retail store itself. Thanks to VR, businesses no longer have to guess whether a new store layout is beneficial to customers or whether product placement is convenient. Virtual Reality developers can create an exact replica of a store but in virtual reality and the retailers would have to do is ask some volunteers to put on VR glasses and browse through the virtual store as if they were in a physical one. The glasses can track motions, so you know what the users noticed or paid attention to and their movements throughout the virtual store.
Some brands have already begun implementing VR in their stores. Tommy Hilfiger became the first big brand to offer VR headsets in their stores, which allowed customers to immerse themselves in their autumn/winter virtual reality fashion show. Also, the luxury brand Coach has installed VR headsets in 10 malls around the country to give their customers an all-access view of their newest runway show. Speaking of fashion shows, let’s take a look at an interesting Virtual Reality Fashion Showcase that recently occurred at the Ukrainian Fashion Week 2018.
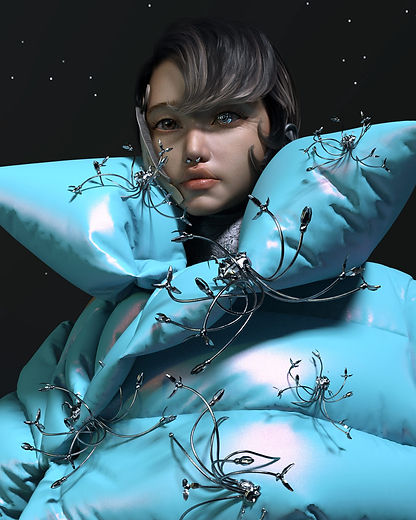
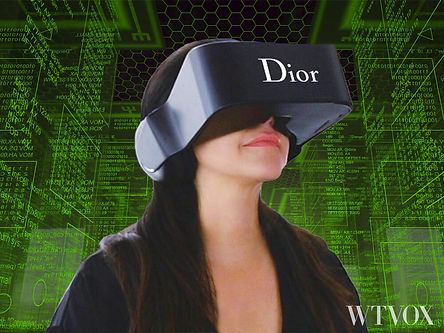
Although VR is at its early stages, picturing the future of VR in fashion is not that difficult.
And there are many reposts such as The International Data Corporation (IDC) indicating rapid growth for the future of VR.
According to Goldman Sachs’ study, IDC predicted that VR/AR market will reach $182 billion in revenue by 2025, bypassing television.
Source: startbeyond.co
This includes both hardware and software/content.
Virtual reality and augmented reality could certainly become a powerful channel for brand-consumer interactions.
Just like the role of MOBILE and SOCIAL in our lives today.
However, current pricing has slowed the mainstream adoption:
-
Two of the most popular VR headsets, Oculus Rift and HTC Vive are priced at $600 and $800 respectively.
This has made the implications of VR and AR more or less limited to mobile apps at the consumer level.
But, there is plenty of ENTERPRISE OPPORTUNITY for fashion companies regarding VR technologies.
Diving deeper into Unity interactions in a fashion related context
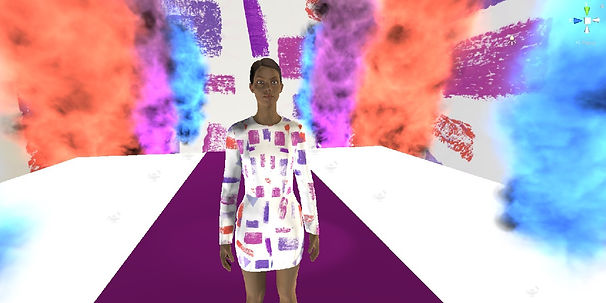
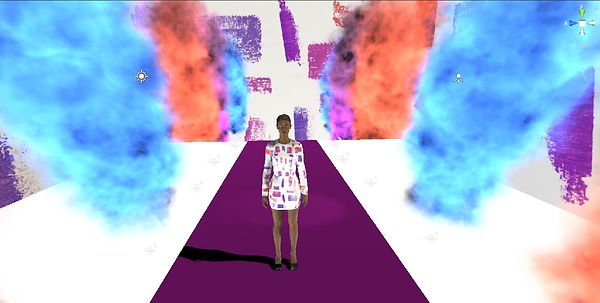
I want to create a runway for a fashion show by letting an Avatar walk thorught it.
I think I want to mark it my doing a lot of colourful smoke that I used for the factory and multiply it in the scene
Doublicating and changing th colour of the smoke.
Therefore I had to go back to the inspector and
adding "Colour over life attribute" to change it to orange.
I created an atmosphere by putting up my own developed prints from my previous semester on the wall of the room

Arrangin the different collumns how I want with W and placing the camera/player in the game option correctly so the viewer gets instantly immersed


I tried to make them as bid so the view would come from lower, they seem more powerful that way.
I already had my headset installed in the scene so I build a small room around the smokes just by cubes and placing correct lightnening.


Importing Avatar from CLO with clothing
To show my clothes in a VR environment it is important to import in in unity as well.
In this case I exported the Avatar with the existing dress and its texture (own developed print) as an .fbx and inmported it as an asset in the Scene
I also added another plane in a different colour with a spotlight to implify the runway.


