top of page
DAZ STUDIO BASICS
Diving in to Basics of DAZ


To have an easier start I use the genesis 8 Product with its body template that I will adjust and deform. There are several elements that can be changed on an avatar. Basically, every little detail can make a huge difference in the end.

How to "get around" in DAZ:
There are icons on the
On the sidebar, there are different tabs for several actions.
Under Scenes, you can click on the different body parts and manipulate them differently.
In the parameters below you can swap the handles to the side and see the changes immediately.
There is also a setting for the environment as well as lights, cameras, and poses. Every tool is quite self explanatory and it remind me a lot fo CLO 3D.
When clicking on the body part you want to work on in the sidebar and hit the View frame tool, this part will be in focus.
For moving the Avatar around zooming in and our, theePan tool and Orbit tool above are being used.


Adding an environment and pose

To test I want to use an environment template to see how it looks and get a feel for the sizing, behaviour of the character inside etc.
I went to Genesis 8 environments and applied it.
Then I moved the character out of the building and gave it a different pose just to experiment.
Also from genesis in the side tap under> Poses.


To test I want to use an environment template to see how it looks and get
a feel for the sizing, behaviour of the character inside etc.
I went to Genesis 8 environments and applied it.
Then I moved the character out of the building and gave it a different pose just to experiment.
Also from genesis in the side tap under> Poses.
Making adjustments and exporting it
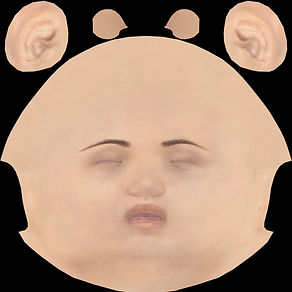
To make explicit changes such as the skin tone, or freckles (in my case), you have to take the texture maps and import them in photoshop, then change what you want to and reimport it to the avatar.
Surface>Editor>Face


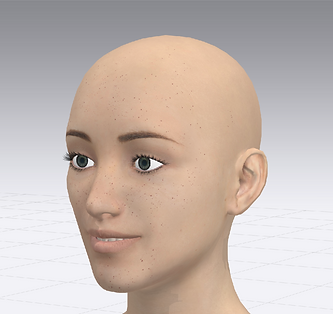
I added freckles in photoshop as you can see. With a simple brush and small drops in skin colour.
Save the picture as jpg and reimport it in the Surface window in DAZ.
Click on the current picture and chose the saved and new face texture.
I added freckles in photoshop as you can see. WIth a simple brush and small drops in skin colour.
Save the picture as jpg and reimport it in the Surface window in DAZ.
Click on the current picture and chose the saved and new face texture.
FROM DAZ TO CLO 3D


I realized that the textures are way softer and it does not look as realistic as in DAZ.
There are still possibilities to change the skin in the same way as I did it in DAZ.
To import the character in CLO, I exported the avatar in DAZ as an FBX. and imported in CLO: Then saved it as an avatar and uploaded it in a new file. So also pose adjustments are still possible.
I wanted to see how the character looks animated so I used the technique as described in the Virtual fashion chapter to give the avatar a motion and make it wave.
FROM CLO TO MIXAMO

bottom of page