Autodesk Maya, commonly shortened to just Maya is a 3D computer graphics application that runs on Windows, macOS and Linux, owned and developed by Autodesk. It is used to create assets for interactive 3D applications (including video games), animated films, TV series, and visual effects.
Through models a game environment comes alive, gives details and enables interaction with its visual (if pleasing or not) impact.
I heard a lot about this program because it is also compatible with CLO 3D which is very interesting for me.
So I decided to take this class due to my learning goals of modeling and combining it with Virtual Fashion in my further studies.
Maya Basics:
When opening the software you will se a grey screen with a Grid which is always placed on Y=O.
For the first assignment we were asked to model a basic room in Maya. I tried to use as many different shapes as possible
(round, squares, shape those, making a window and applying textures such as the floor, a carpet and bed sheets).
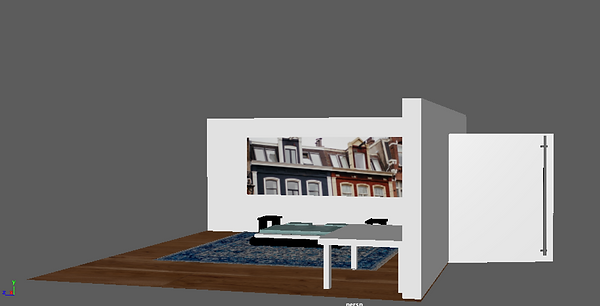


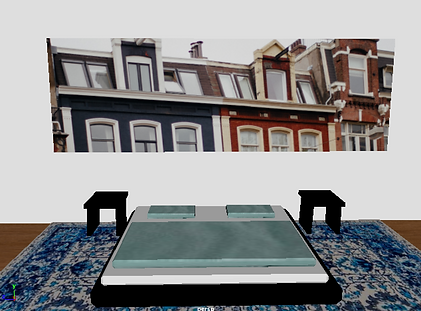


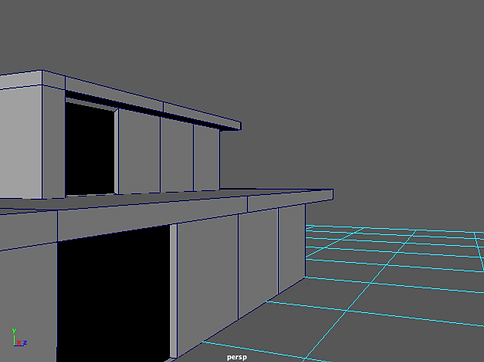


Starting a project: File>Set project>
It is really important to always work in a project, otherwise it can happen that the program crashes and you loose your files or it is not saved correctly
Maya work in a 3D sphere which means it calculates on the X,Y and Z axis.
The view can be changed by using the right mouse button and keeping (in my case MacOS) option pressed.
With left mouse button move to left and right = Scene moves from left to right
" Move mouse up and down = Scene moves up and down (360° possible)
Scroller pressed = Drag the scene
Scroller "rolling" = Zoom in an out of scene
F= Focus on a selected object/part
Changing the perspective to Side, Front and Top view is easy by pressing the spacebar and then getting a complete overview.
Put the mouse over the view you want and press spacebar again.
This is really handy, especially when you work detailed and try to match surfaces, getting them on the same hight or width.
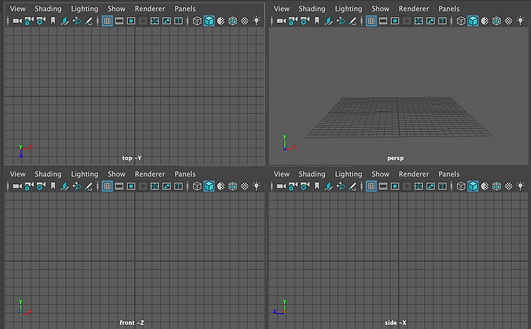
When saving, make sure to use File>Save Scene and save it in your created project to it is easy to find and organized.

For my first experience with maya I used the LikedInLearning tutorial provided by Freark:
Maya2020 Essential Training with George Maestri Chapter 1 - 10
1. I started creating a Plane for the floor by using PolyModeling>Polygon Plane. With the Shortkeys W,E,R it is possible to change the size, angle and position
W= Move
E= Rotate
R= Scale
To continue with the room, I built walls with Polygon Cubes and placed them on the edges of the plane with Spacebar>Top view>Spacebar
For the carpet, the tables and chair I used again cubed, sizing them according to the right measurements.
I switched between the views to make sure the sizes were correctly.

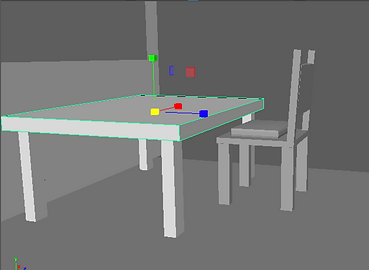
The bed was a bit tricky because I wanted it to be round. So I look up this tutorial:
The solution was that with the option Edit Mesh> Bevel, the corners would round and a nice shape would come out. I used the same method for the pillows and blanket of the bed.
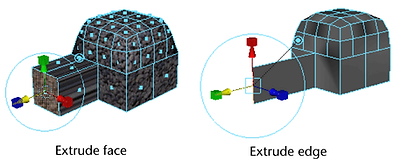
Another really important tool I used a lot is >Extrude or on my keyboard >commandD
I can add polygons to an existing mesh by extruding polygon faces, edges, or vertices.
When I extrude a face on a polygon mesh the existing face telescopes inwards or outwards as it creates new connecting faces on the sides of the extrusion.

!!!! It is a difference if you duplicate an object (commandD) or extrude it (Ctrl+E). I mixed it up sometimes.
-
Select Edit Mesh > Extrude in the main menu bar
-
Select Bevel Edge from the marking menu
(Shift + right-click) -
Click EXTRUDE in the Modeling Toolkit window
-
press Ctrl + E
-
Shift + drag any transform manipulator when in component selection mode.
-
It depends on what I want to extrude I I click >Face and then select the face or >Edge and extrude only the edge (line of the edge)
-
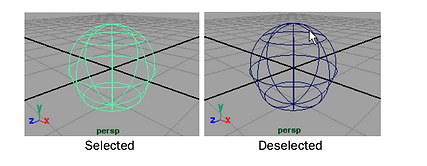
>click right mouse button> press object mode> object is selected
-
>click right mouse button>press face> select single face of the object

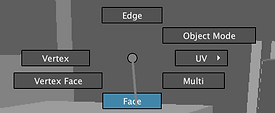
For me modeling with Maya is a lot learning by doing. Since there are several different possibilities to get to the same result. So I have to find my way of doing it and see what works best for me now, that i have the Basic skills and know a bit how the program works.

When several polygons form in this case a table, it is wise to group the (see group1). So they are seen as a whole object but also when you click on the plus in front of the group visible on their own.
How to group single objects:
>Select a cube> drag it onto the other one> add as many cubes as belong to the piece of the table> name it table

Model as a hierarchy of separate pieces:
A Model consist of seprate Polygons forming the illusion of, for example a table but actually it is 4 skinny poles (legs) and a flat cube (surface)
It is possible to view this in the Hierarchy window:
We continued by applying simple textures.
>Rendering> Lambert> Changing colour from the palette
or for an own image: >Rendering> Lambert>Create Render Node>File> Upload the file
Here is the result of applying several textures and colours to my room:


The UV Editor lets you view and interactively edit the UV texture coordinates for polygon and subdivision surfaces within a 2D view. For more information on how UV shells are used, see the related topics below.
You can select, move, scale, and generally modify the UV topology for a surface very much like you work with other modeling tools within Maya. You can also view the image associated with the assigned texture map as a backdrop within the UV Editor and modify the UV layout to match as required.
To open the UV Editor make sure I am in object mode:
-
Select Windows > Modeling Editors > UV Editor
-
Automatic so it will unwrap correctly
-
Order the pieces and sizing them until your satisfied
-
Delete the history
We continued thinking bigger, got introduced to Normals, to the UV Editor for more realistic textures for our 2nd assignment:
To create our dream house.
The pool
>creating a polygon cube (stairs and pool)
>face>extrude big surface lower
so the pool has depth
>render>texture>file>water illusion
>add a plane on top with the same material as from the glass for a more realistic feel

BUILDING MY DREAM HOUSE
Here as you can see it is not unwrapped correctly, it is all over the place that's why on the top in the 3D window it is all blurred.
Tutorial by Freark:
Then I coloured the doors using >render>blinn
and tweaked around with the options until I liked the look
For my modern house I used mainly cubed and extruded them for a look of a door or the roof to keep it clean and minimalistic.
I will add a pool, glass and a garden for more texture interaction and trying out as many materials as possible.


Adding textures to the fllor(inside) and the garage door:
>choose a material>render>lambert>select file
>UV unwrap and move them accordingly
For the door details I used >Face>Extrude>Shifting to back
Then added two enlarged narrow Cylinders as door handles for a more modern look.
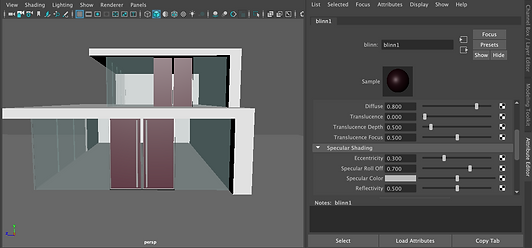
First I created the ground floor with a lot of separate cubes which will become windows later and a door. Then I grouped it and duplicated it on moved it with the short key W up and scale it down with R.

Creating the windows:
>Polygon cubes> place them next to each other with the help of perspective side
>Adjust thickness with W
>choose a material>render>lambert>set transparency
>for a more realistic feel I gave it a light blue shape since the sky could be mirrored in the glass from the outside


I really enjoyed this exercise and I could see my skills developing fast due to using familiar shapes and also experimenting with new materials such as glass or simulating water. I realized that in Maya there are a lot of different ways to get to a similar result, you just have to try out what works best and most efficient for yourself.

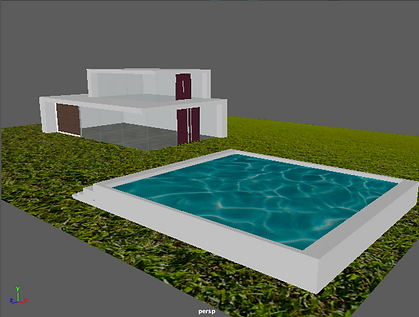


OUTCOME
BUILDING A MEDIEVAL CART
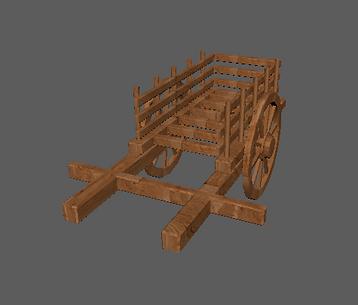
In order to practice modeling, using UV editors and working more in detail, we got the assignment to model a medieval cart.
Inspiration and tutorial:
https://www.youtube.com/watch?v=yVuwyOZIZOo
I started developing the Wheels.
>Create Polygon>cylinder>scale it down
>add another cylinder in the middle
>right mouse button>face> select every second face
>com+E extrude until it touches the outer circle
>shape it nice and extrude the top face of the inner cylinder for the screw connecting the wheel to the wagon

When finishing the wheel, i just duplicated it to the other side (commandD= and Rotate wit short key E so it is mirrored.
Then I used several >Polygon Cubes to form the wagon always duplicating (com+D)
I used different perspectives to see how they match, touch and distance.


Some problems occurred when I tried to extrude the upper part but I fixed it thanks to the tutorial. The problem came because I thought it was not straight so I tried to straightened it but I did the exact opposite.
But I learned from this mistake and I know how to handle it now.
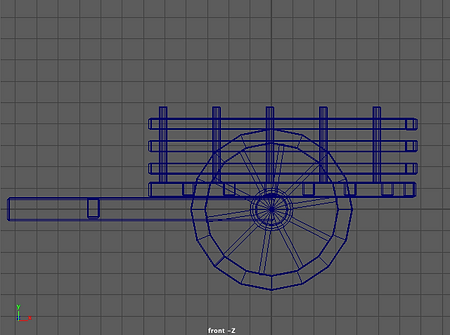
UNTEXTURED CART


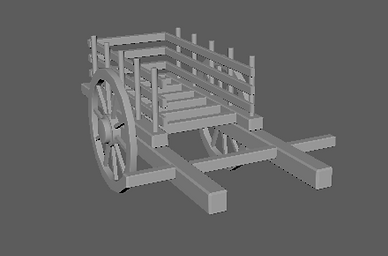

When texturing the cart I applied a big wooden texture file on it but it was completely disorted and stretched on most of the parts.
So I had to create UVs for the parts and fix it manually.
-
Select Windows > Modeling Editors > UV Editor
-
Automatic so it will unwrap correctly
-
Order the pieces and sizing them until your satisfied
-
Delete the history

In addition to that we got introduced to Mudbox, another program which is very useful for applying textures.
It is very compatible with Maya so sending files from one to the other program to fix stuff or correct something is very easy.
There I will refine the texture of this and send it back to Maya with:
From Maya to Mudbox:
Maya>Select File > Send to Mudbox, then select from the following options:
Send as New Scene: Opens a new scene in Mudbox, and sends the selected objects.
From Mudbox back to Maya:
Select File > Send to Maya, then select from the following options:
Send Selected as New Scene: Opens a new scene in Maya, and sends the selected object from Mudbox
MODEL AN EASY AVATAR
As an assignment we were suppose to model an easy Avatar to learn how to animate it later on.
I created a cube and extruded several faces to create my avatar.
It was important that it is one polygonal primitive so it is easier to animate it in the end.
ANIMATION BASICS
This technique makes it possible to basically turn every jpg or for example a print that I can develop for a fashion item into a smart material on substance.
By gaining this skill I can work way more individual and creative.
21/10/2020
Today we learned about our first animations in Maya:
We were animating a jumping cube.
1. Set key frames (here 50)
2. Put your focus on the model you want to animate
3. Click S on the key frame 1 and position the cube where it should start animating
4. For every additional key frame click S and move the cube accordingly (where you want it to jump)


Several options to animate only one attribute:
1. S=keyframe everything in the channel box
2. shit+W/E/R= to limit the amount of information
3. go to the channel box an click manually on the axis you want to change then press right mouse button and click key selected
In the Graphic Editor it is possible to change the rotation, scale and position of the cube on every axis. (X,Y,Z)
You can specifically click on the option you want to change and then tweak around until it matched what you want to animate.
Changing the timing:
Through timing the animation can have a completely different effect.
This can be tweaked by holding shift+select the key frames you want to slow down or speed up and drag them to the right or left depending on the spot where you want it to speed up or slow down.
click on key frame> middle mouse button drag>let go and drag the selected key frames to a new position


Changing the in between key frames:
It is possible to tweak the in between points (key frames) of a Graph as well by clicking on in in the Graph Editor and then changing the handles.
When a handle is selected I can move it up and down with the middle mouse button so it will change the behavior of the animation on the selected axis.
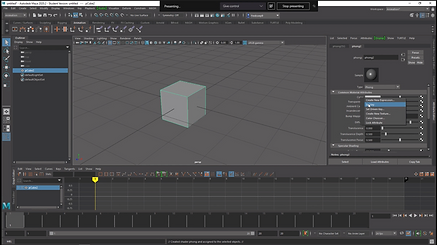
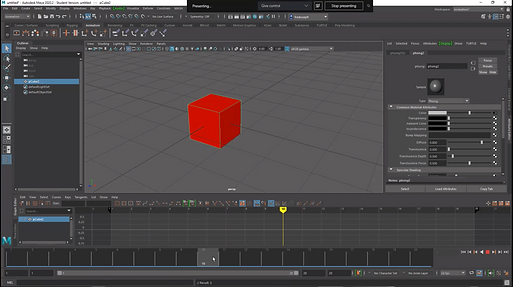
Changing colour in the animation
1. Select our animated object
2. Assign new material
3. Chose a colour
3. Select>Set key when you are at key frame 1 ( in my case) and the colour will be applied at this specific key frame
Then go to the next key frame where you want another colour and do the same procedure again.
ANIMATING A SKELETON AND WORKING WITH JOINTS
In this lesson we got introduced to working with joints and connecting/disconnecting them as well as adding joints to a skin
What are joints?
Joints are the building blocks of skeletons and their points of articulation.
Joints have no shape and therefore can not be rendered.
Each joint can have one or more bone attached to it, and more than one child joint.
Joints let you transform a skeleton when posing and animating a model.
Bones do not have nodes, and they do not have a physical or calculable presence in your scene.
Bones are only visual cues that illustrate the relationships between joints.


It is always handy to group the joints for the whole arms as well as naming them separately to keep it organized:
To Connect the cylinder and the joints to be able to create an animation:
1. Select shoulder joint +shift+cylinder
2. Go to the menu>skin
3. Click >Bin skin to combine the sphere and the skeleton
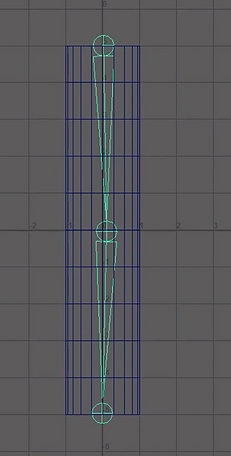
1. Set workspace to Rigging
2. Create a Cylinder
3. Go to the side view to create joints and place them inside the cylinder
(The primitive has always to be bigger)
CREATING A JOINT:
1. To an arm you need three joints (shoulder elbow and wrist)
2. For each joint click the left mouse button and a joint will appear
3.Enter to finish
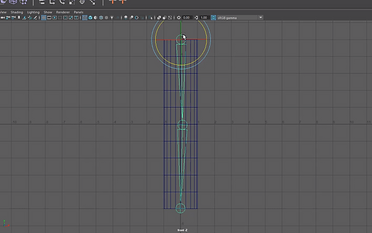
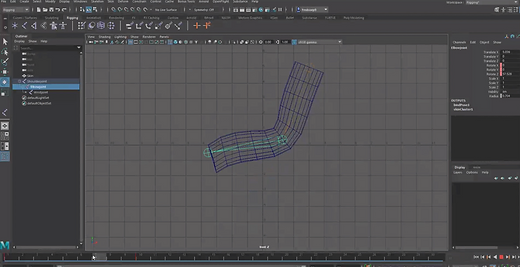
To create an animation, the joints are being animated and the skin (cylinder) follows since they are connected now:
1. Set a key frame from 1 to 10
2. shift+W to set
3. click on each joint and move them according on how you want them to move in the animation and press S to set the current motion on a key frame

Work with Hypergraph Hierarchy to parent and unparent joints to form a skeleton.
Here I tried to create an animal with a long spine and a front and back leg.
1. Order the joints according to the shape of the skeleton
2. Connect the joints such as join 13 and 4 to join the leg and the body (as with 8 and 1)
3. To (Un)-Parent them go to Menu>Edit>Parent
(It would also go with the mouse but that not working for me)
For an easier and more dynamic animation it is possible to use inverse Kinematics:
With inverse kinematics (IK), you move an IK handle to pose an entire joint chain. An IK handle is an object you can select and move that affects the joints it is assigned to.
A joint chain that has an IK handle is called an IK chain. When you pose and animate a joint chain with an IK handle, the IK solver automatically rotates all the joints in the IK chain. The IK solver is what Maya uses to calculate the rotations of all the joints in the IK chain when you position the IK handle.
NOTE:
-
Not possible to add or remove joints from a skeleton if it is bound (skinned) to a model.
--> If you do so, you will have to redo the IK handles or the skinning
START MODELING THE MACHINES FROM THE FACTORY FROM THE PROJECT
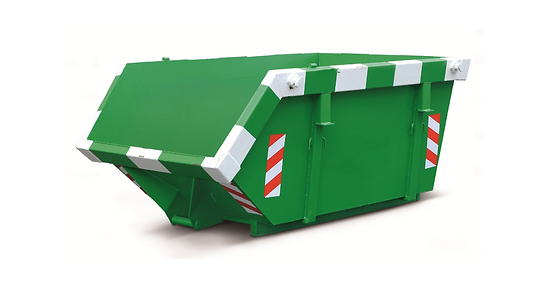
HALF OPEN CONTAINER:
After taking the VR Asset classes I feel prepared and ready to start modeling the machines even though I still take tutorials as help for more specific questions and guidance.
First I am modeling a half-open container as the detail that I placed in the factory.
Therefore I created a cube and extruded the sides for the basic shape. Then I added the sides, whereas I used Vertex to shrink them down to the exact shape of the foundation of the container.
In addition, I put a thick railing around it mostly for aesthetic reasons by playing again cubes onto each other and forming them with vertex and extrude.
Reference picture:
After that, I UV unwrapped the container with all its different pieces. It took me some time to realize when clicking double on one part automatically all the connected pieces are selected as well and it can be placed and scaled in the texture window as required.
NOTE: For a good texture it is important to place all the unwrapped pieces in the top right box of the XYZ Axis. (1I1I1)
It is also possible to unwrap it piece my piece and then I exported it to substance painter in one go.

After taking the VR Asset classes I feel prepared and ready to start modeling the machines even though I still take tutorials as help for more specific questions and guidance.
First I am modeling a half-open container as the detail that I placed in the factory.
Therefore I created a cube and extruded the sides for the basic shape. Then I added the sides, whereas I used Vertex to shrink them down to the exact shape of the foundation of the container.
In addition, I put a thick railing around it mostly for aesthetic reasons by playing again cubes onto each other and forming them with vertex and extrude.
SEA CONTAINER :
Tutorial: https://www.youtube.com/watch?v=4EXLOFaQzkI

Here as well, carefully UV unwrapped.
I found out that it is easier to do it part my part instead of trying to find the groups first.
So I was looking for the parts close to each other and then ordering it so the texture would look more even
INCINERATOR:


Texturing idea:
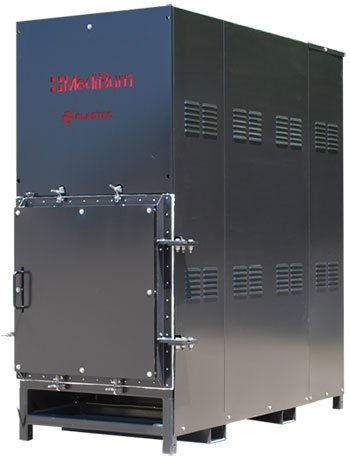
See chapter substance painter for texturing
More complex models
Reference pictures:


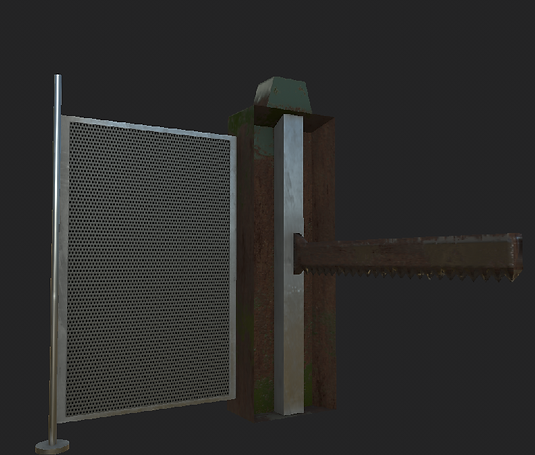
Up until now my models very very geometrical and more simple since I was not too familiar with texturing and Uvs so now I am trying to create a rotary cutter with spikes as one of the machines for the factory.
I first created really easy geometrical stands as the foundation and then adding a saw where spikes are poking out at the bottom.

I created several edge loops and selected every second one so in one go I could push them in with W pressen and decide how long I want the spikes to be.

The UV unwrapping was quite hard since all the spikes were trangles. i could stack most of them together since they are symmetrical to each other but the rest was quite different. At this point it was just trying our, sewing together different parts and see where the given texture in substance looks the best.
Then I added the saw to the main corpus and created a small animation how the saw slides up an down.
Then I added a fence since I though it adds more realism.
First I tried it by taking a lot of thinly stretched cubes and duplicating them on top of each other to create a grid.
This was a nightmare when UV unwrap every single wire.
So in the end I decided to use a plane and add a metal whole structure. It added the same realism and made it way easier and organized in the UV Editor.

Compressor
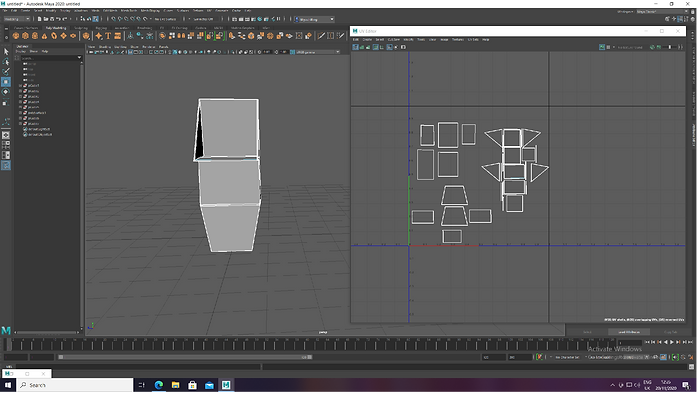
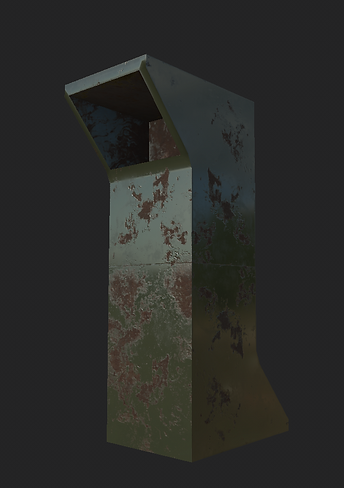
For our game, we needed a compressor that compresses plastic waste into bales. So it has to have an entrance and exit. So make it a bit more interesting and getting another shape into my modeling experience I wen for this s shapes machine.
When modeling those machine it is important that the inside is also covered by a plane so that you can also apply textures otherwise it can not be seen as a texturable surface in substance for example.
To get all the inside face also UV unwrapped I used Right mouse buuton> edge> selct> Ctrl E extrude and lay in on top of the outfacing plane.
I realized that it would be more coherent when I would only do half and mirror it, also to learn a new tool.
So I slimmed down the shape and deleted the upper faces with >select faces>delete
Shredder
Since our last upgrade is shredding paper, we wanted a machine that shredss the paper into pieces.
So I made a machine for that which is not 100% conform with one from a really factory but I thought I give it a try and experiment a bit with spikes since its quite a fun shape to model.
I split it up into two parts:
1. The main corpus which as again a geometrical squarish machine with feet so it can stand over the conveyor belt as well as the wheels with spikes

I started with a cylinder and went to vertex mode and selected every second vertex in rows.
So I could Ctrl. Ex>extrude them to the side with the length I wanted.
After that I sorted the circled on the side since they got a bit messed up.
An alternative method would've been to select all first click on one vertex and then Shift+double click on the following one to select a whole row.
Then press R and straighten them equally in a round circle.
Reference image

Then I extruded the outside faces of the roll and made a new box where I can fit them inside.
UV unwrapping was quite hard since all the faces of the spikes had to be sewn together or stack into each other shells.
It was also quite difficult because they weren't one object, but I combined them with Mesh>Combine
Waste models for the factory
One of my main work progress I could see was when I created waste for our factory. I tried to create as many as possible since we have 5 different kinds of waste to recycle.
I learned how to make organic shapes as well as modeling from a reference picture which I haven't before as well as texturing in Maya because I mainly do it in Substance painter.
I also made some planes with the sculpting tool to use it a bit more and experiment a bit. It went really nice but then I couldn't reverse it and place it underneath so in unity I would not have a backside. So we didn't chose it for the game.
Metal:
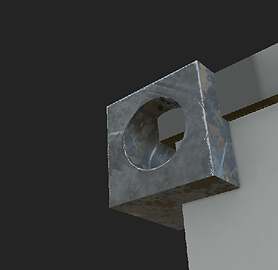
For those ones I used geometrical shapes that can easily be grabbed by the claw such as this cube which I explained the process in the container, it was a detail on the edge there
I made a cube and then two crossing cylinders.
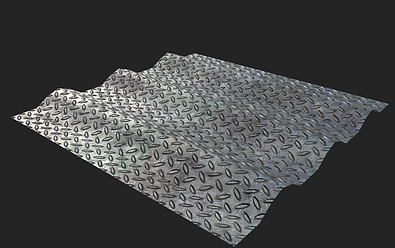
Then I transformed the cross by using the deform tool and then it made wholes/cut outs on the parts where the cross was.


Plastic:
To bring a bit more variety in the game I tried to recreate some branded packages also to improve my UV mapping and texturing in Maya.
I also modeled for the first time with a real reference picture and it really helped me working more realistic and in proportion.
To import an image you go to:
Keeping the symmetry on the x Axis to always have the same proportions on both sides.
When UV unwrapping: Take care to unfold everything and then apply a material.
Go to the file and upload the image. in this case, there were already finished textures but the placing and rearranging them in the UV Editor helped to make it more realistic.
Tutorial: https://www.youtube.com/watch?v=QbfSrx6mRPg

I experimented more by making a snickers shape, and a bale of plastic bags with known companies as more recognition in the game.


Paper waste:


For more technical modelling process see Chapter 10:Modeling Fashion Items.
There I modeled my personal Fashion items with the gained skills from VR Asset classes, tutorials as well as modeling machines and waste for the VR factory.
What I learned in this Chapter:
Crumbled piece of paper
